Klaviyo doesn't offer SMTP or IMAP access to connect a mailbox directly, so a normal warmup connection isn't possible. That's exactly what Seedlist Warmup is built for: instead of connecting your mailbox, you add E-Warmup's seed addresses as a list inside Klaviyo and send to them from a Klaviyo campaign. Our network engages with those emails the same way it does with a connected mailbox, and your sending domain's reputation builds normally — so by the time you're sending real campaigns, Klaviyo's own IPs and your domain are already trusted by inbox providers.
This guide walks you through warming up a Klaviyo sending domain with Seedlist Warmup, start to finish.
Prerequisites
An active E-Warmup account
Seed credits (purchase from the dashboard)
Access to your Klaviyo account, with the sending domain you want to warm up already verified in Klaviyo
Step 1 – Open Seedlist Warmup: Log in to your E-Warmup dashboard and open the Seedlist Warmup section from the left navbar.
Step 2 – Choose or purchase seed credits: Select a pack that matches your needs:
Warmup Launch – 200 credits ($19 one-time)
Warmup Campaign – 600 credits ($37 one-time)
Warmup Session – 1,000 credits ($55 one-time)
Or contact us for a DFY / custom pack
Credits never expire and can be used across unlimited campaigns.
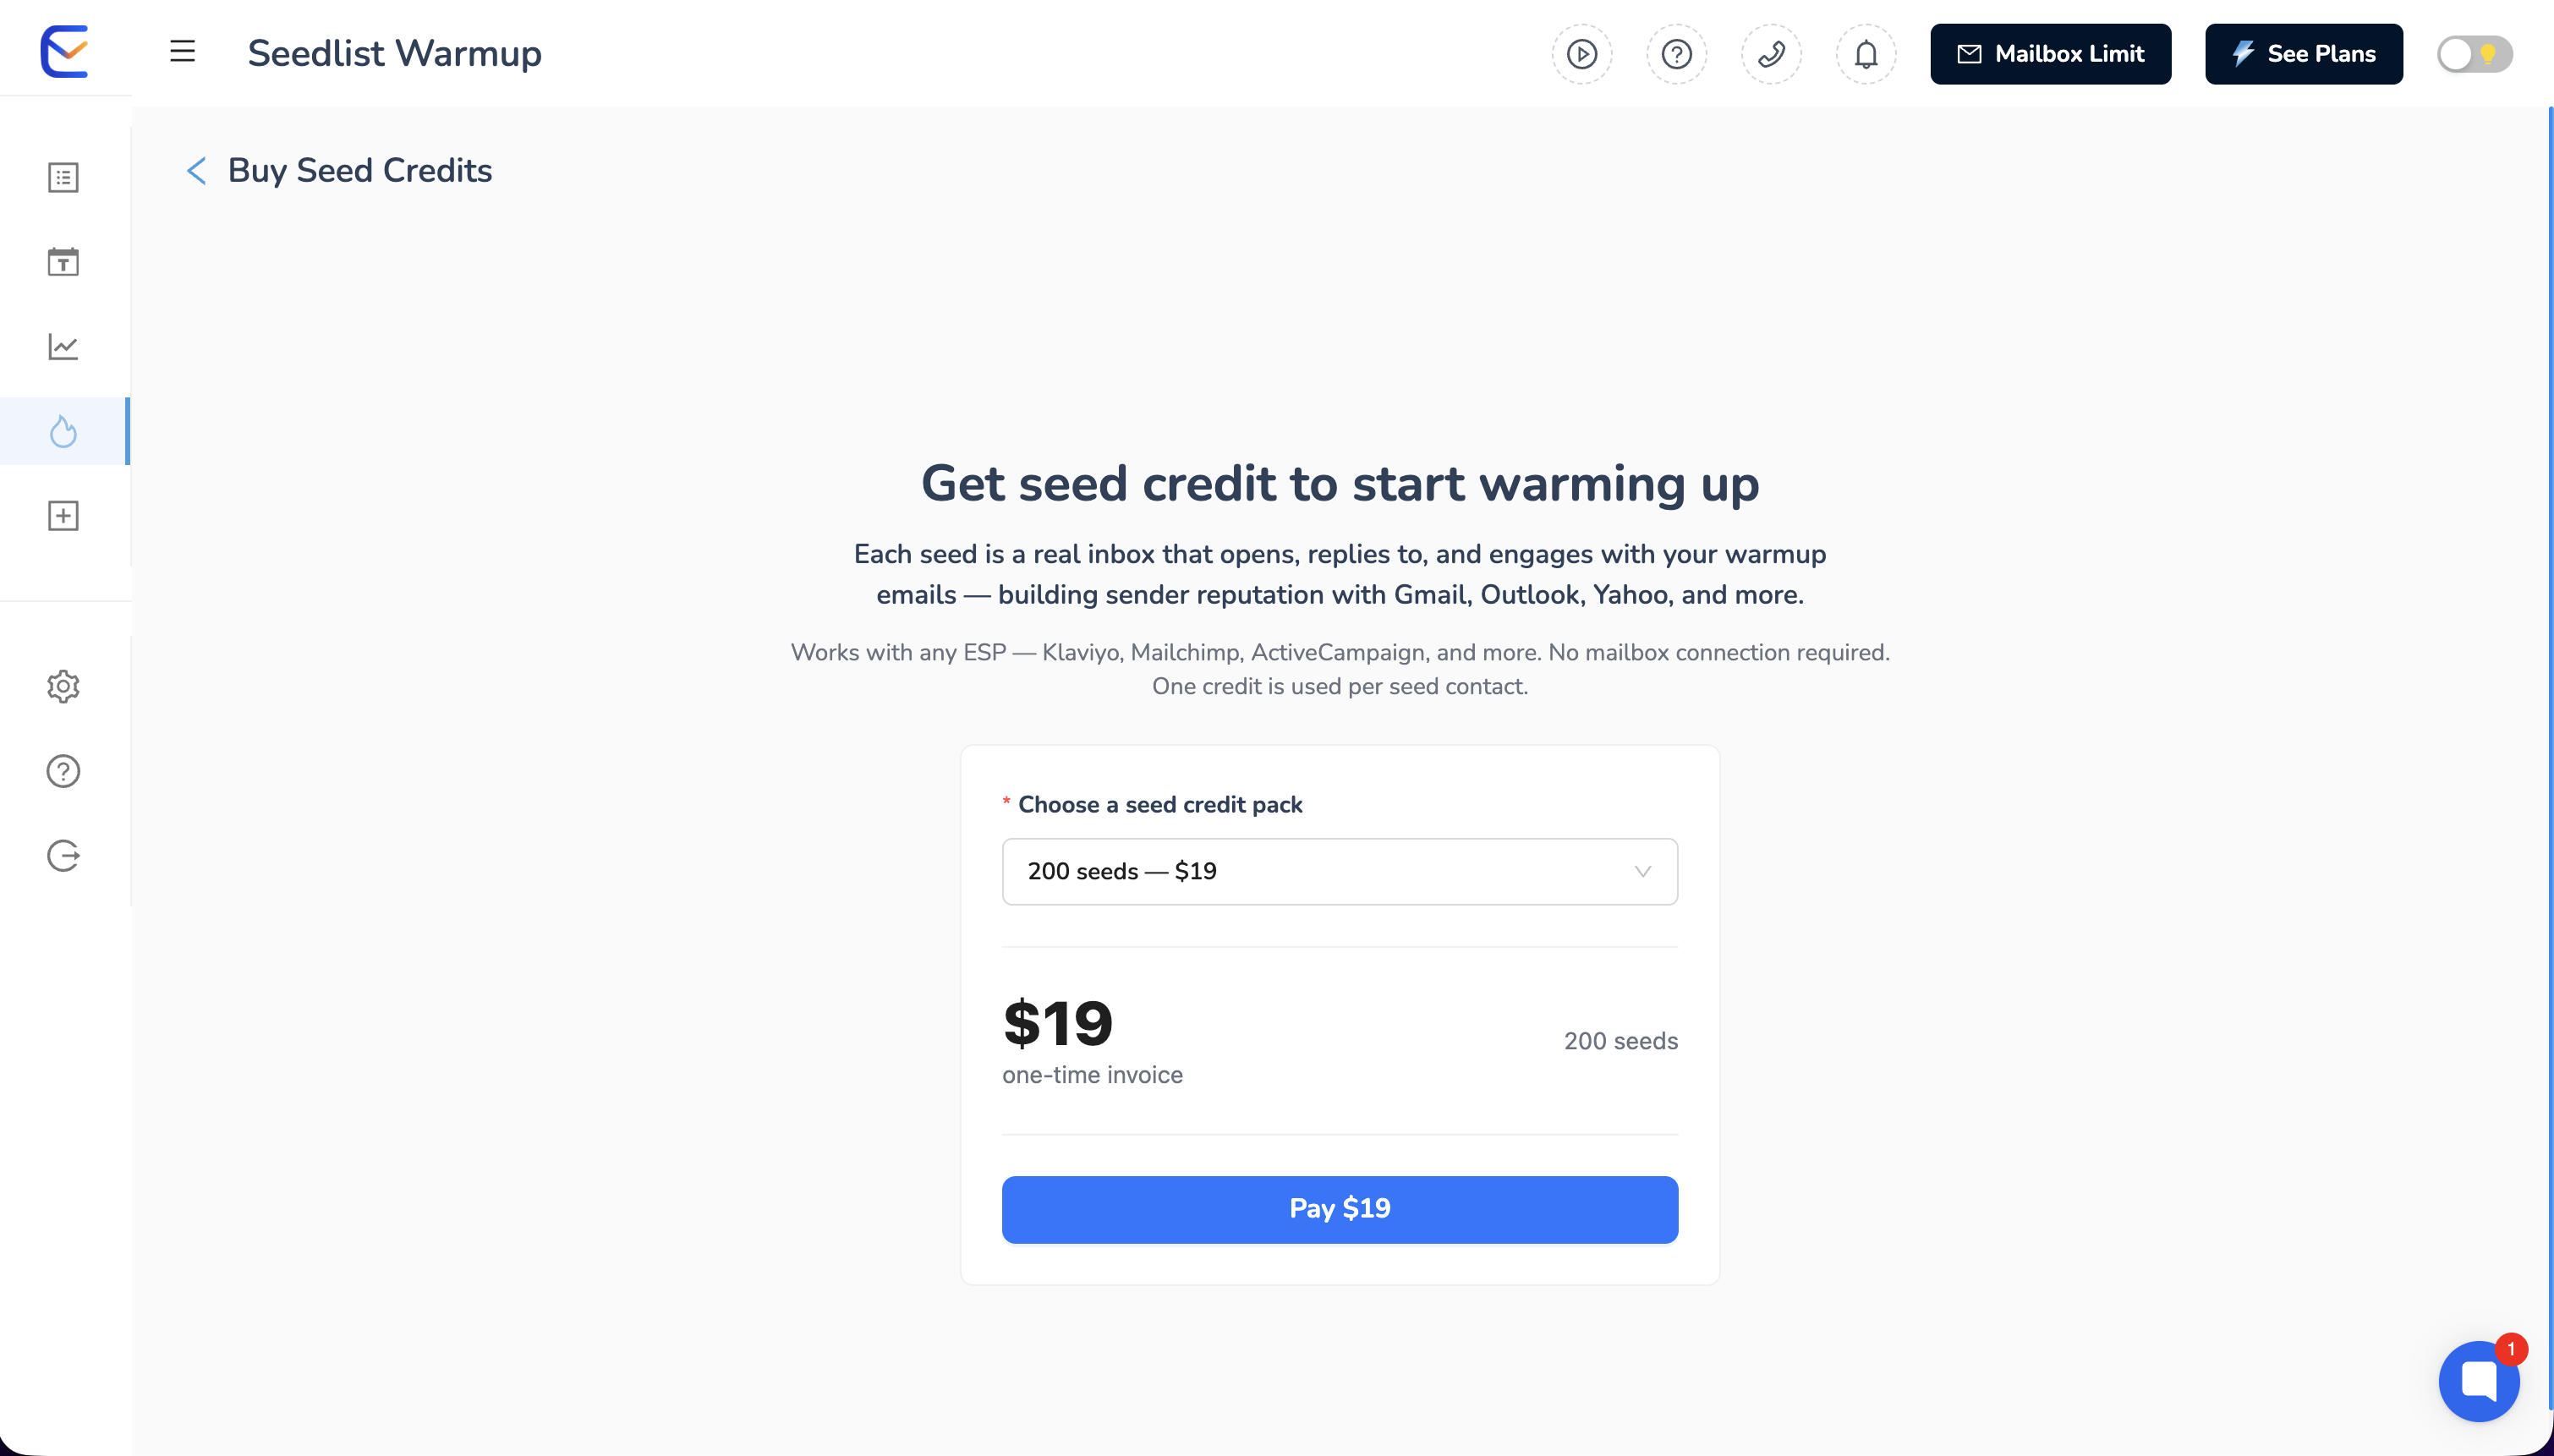
Not sure which pack to choose? Contact live chat support and we'll help you size it to your sending volume.
Step 3 – Configure the campaign
Sender Address – In the Sender Address box, enter the exact "from" email address you'll use to send the campaign from Klaviyo (this should be on the domain you're warming up).
Download the seed list – Download the latest seed list (CSV). Lists are mixed across Gmail, Outlook, and Yahoo and support both B2B and B2C orientations. Always download a fresh list before a new campaign.
Import the seed list into Klaviyo – In Klaviyo, go to Lists & Segments → Create List, and import the CSV you just downloaded. This becomes the audience for your warmup campaign.
Set up tracking – Copy the unique tracking code shown in the Tracking setup box. In Klaviyo's campaign editor, paste this code into the email body of the email you're sending to the seed list. This is how E-Warmup detects when your emails reach the seed addresses. After adding the code, check the box: "I've added the tracking code to my email body."
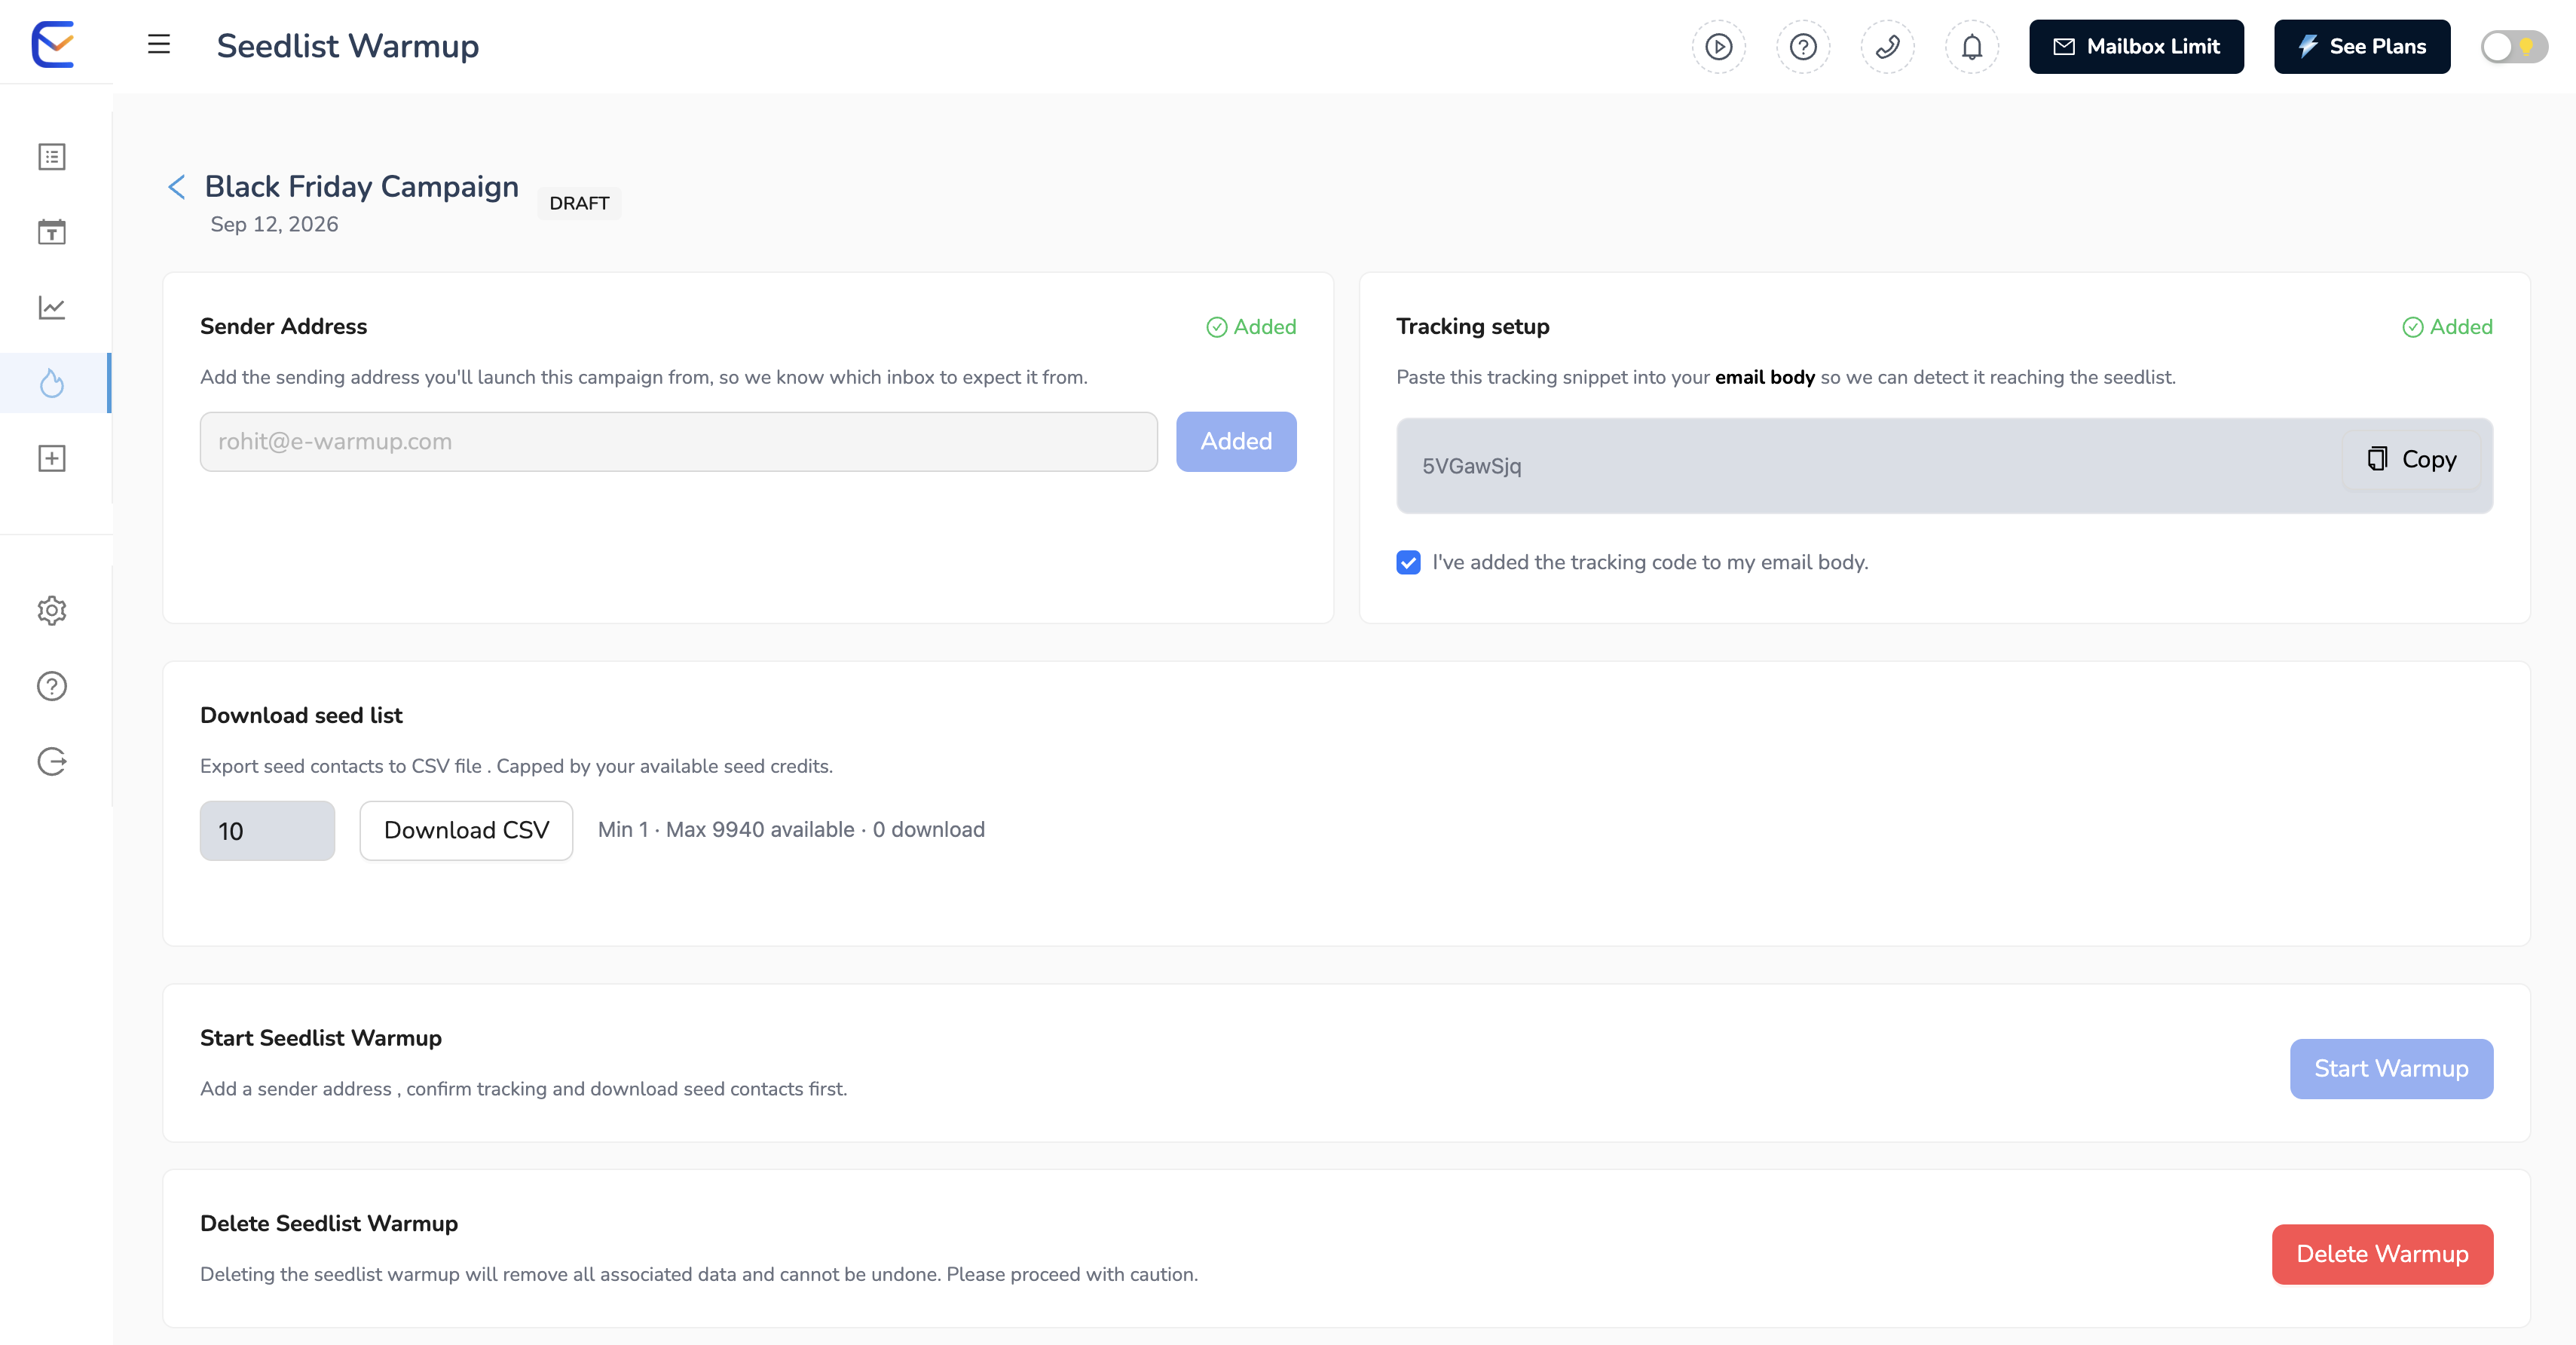
Step 4 – Launch the campaign and start warmup:
In Klaviyo, create a campaign, set the audience to the seed list you just imported, and send or schedule it as you normally would. Then come back to your E-Warmup Seedlist Warmup campaign, click Start Warmup, and select when the seed warmup system should begin.
Note: Send this campaign only to the seed list you imported — not to your real subscribers.
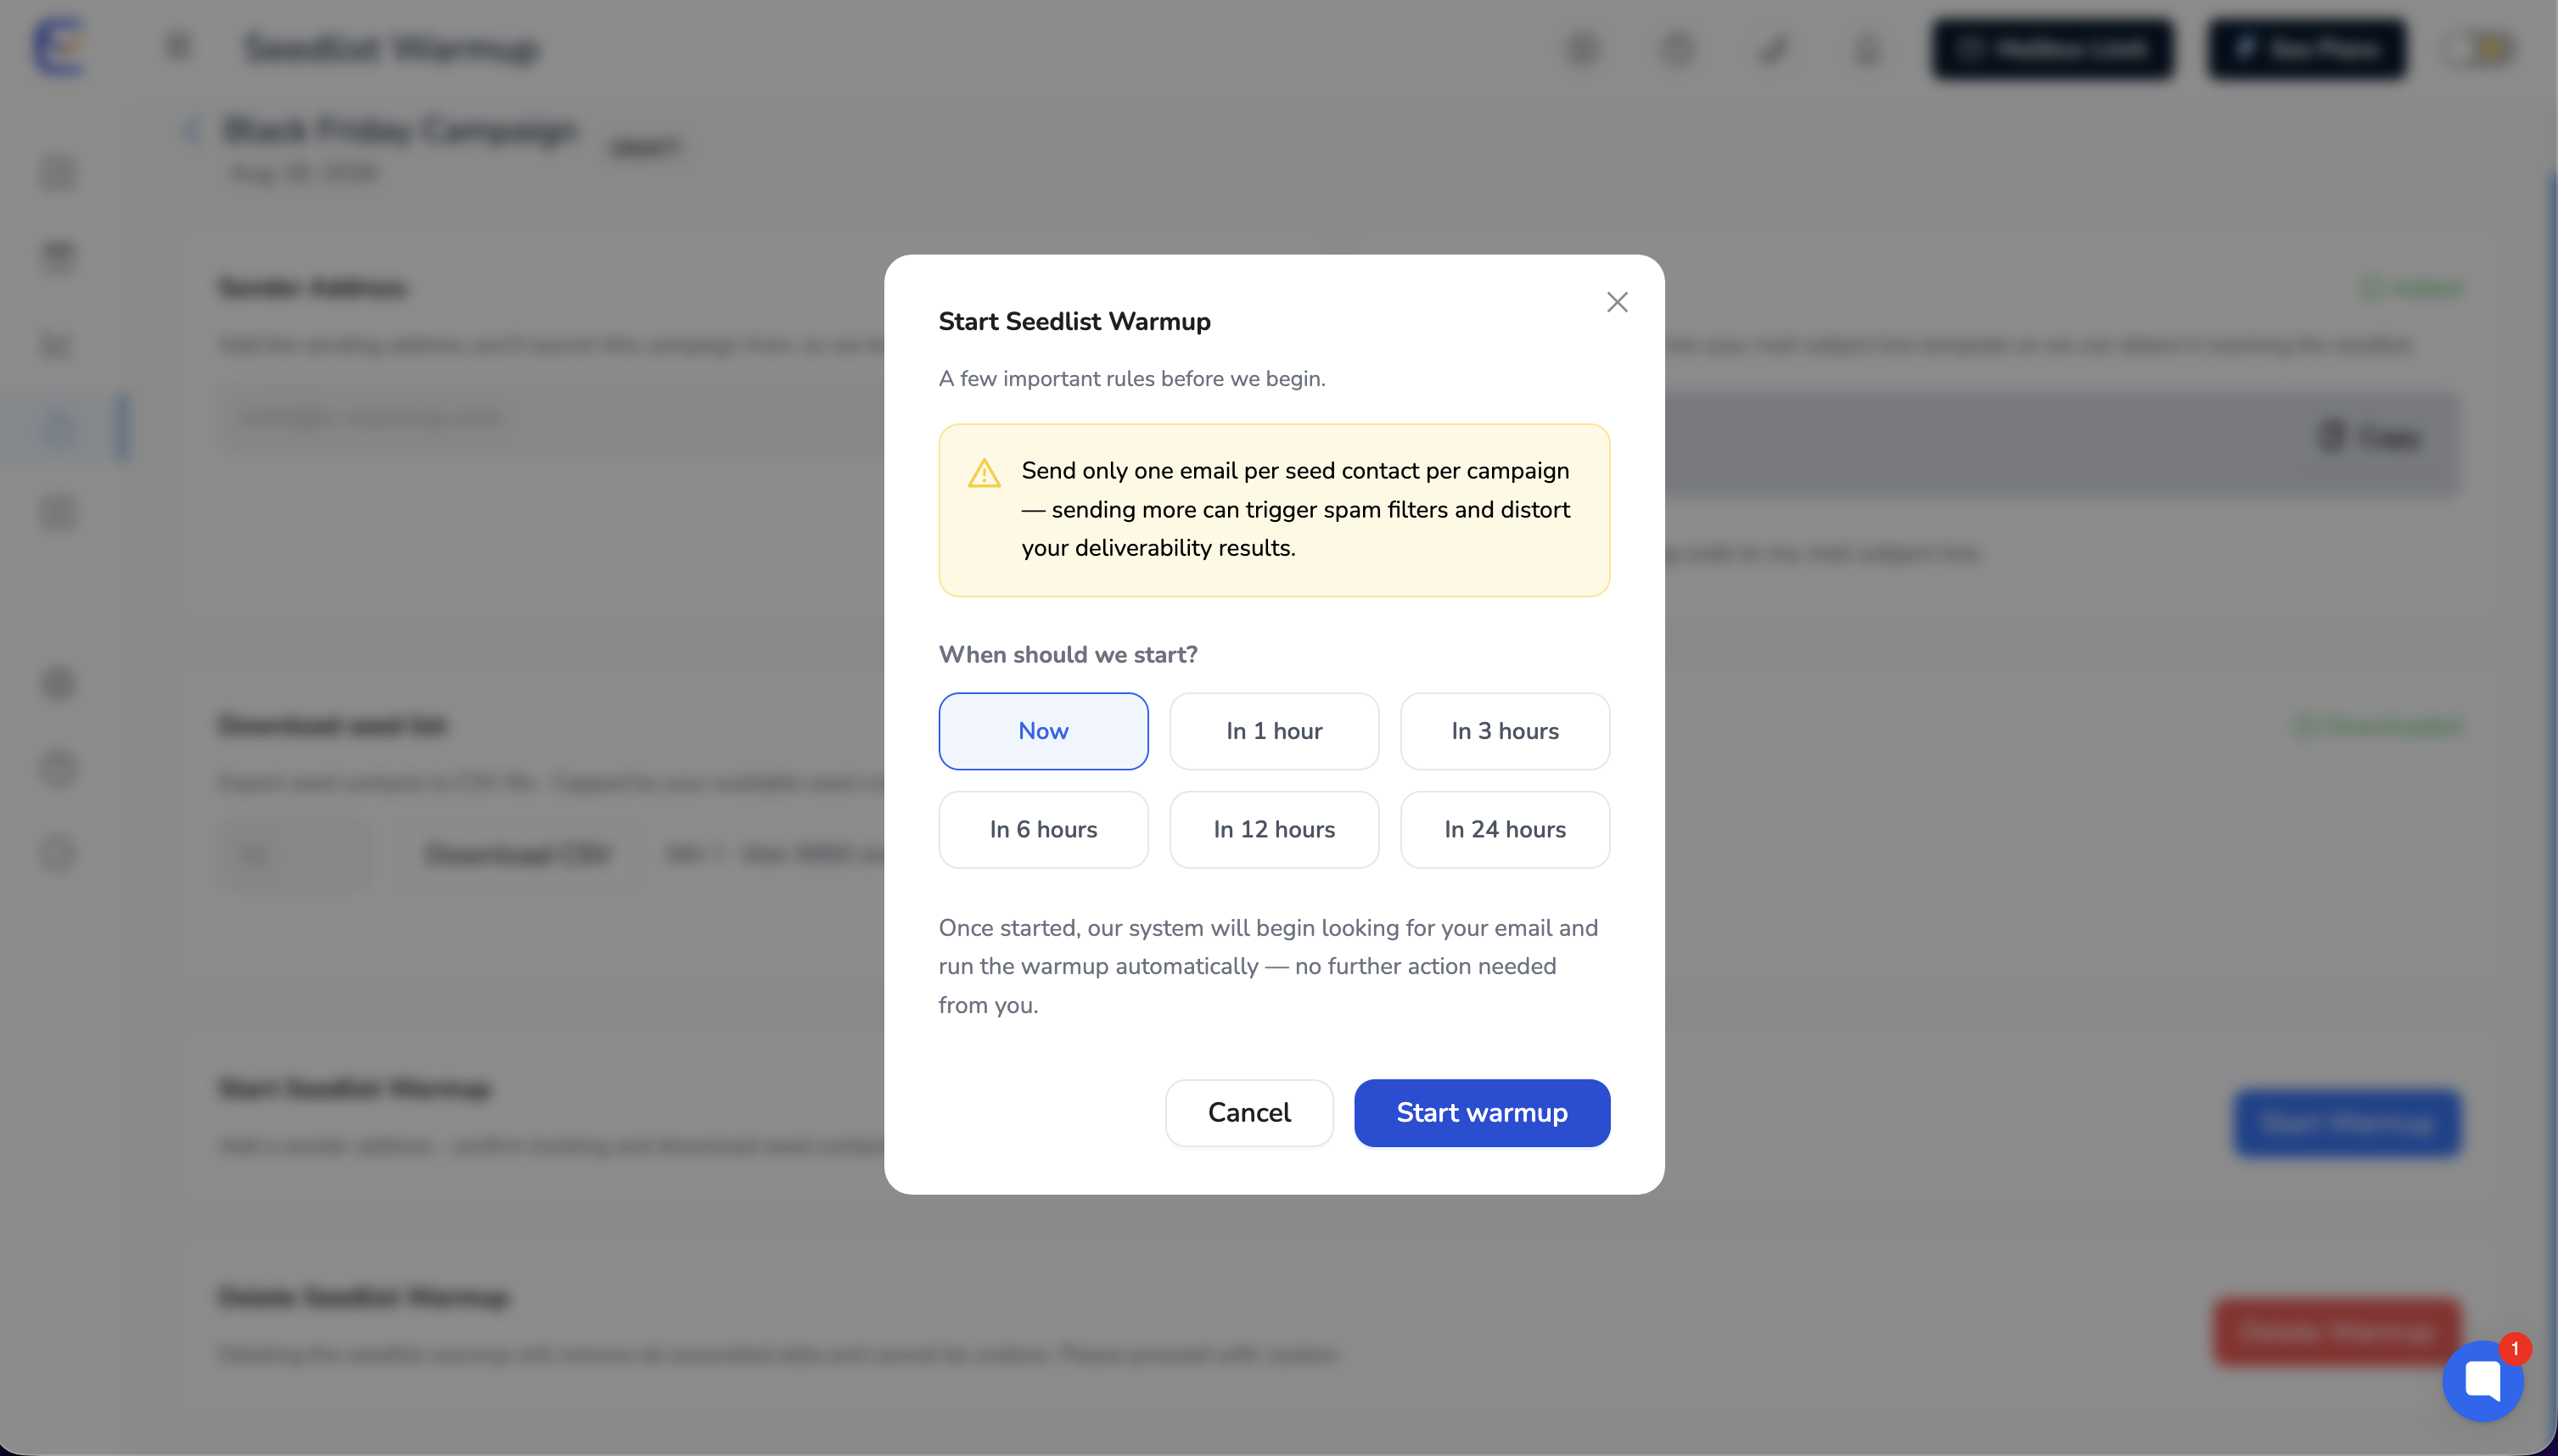
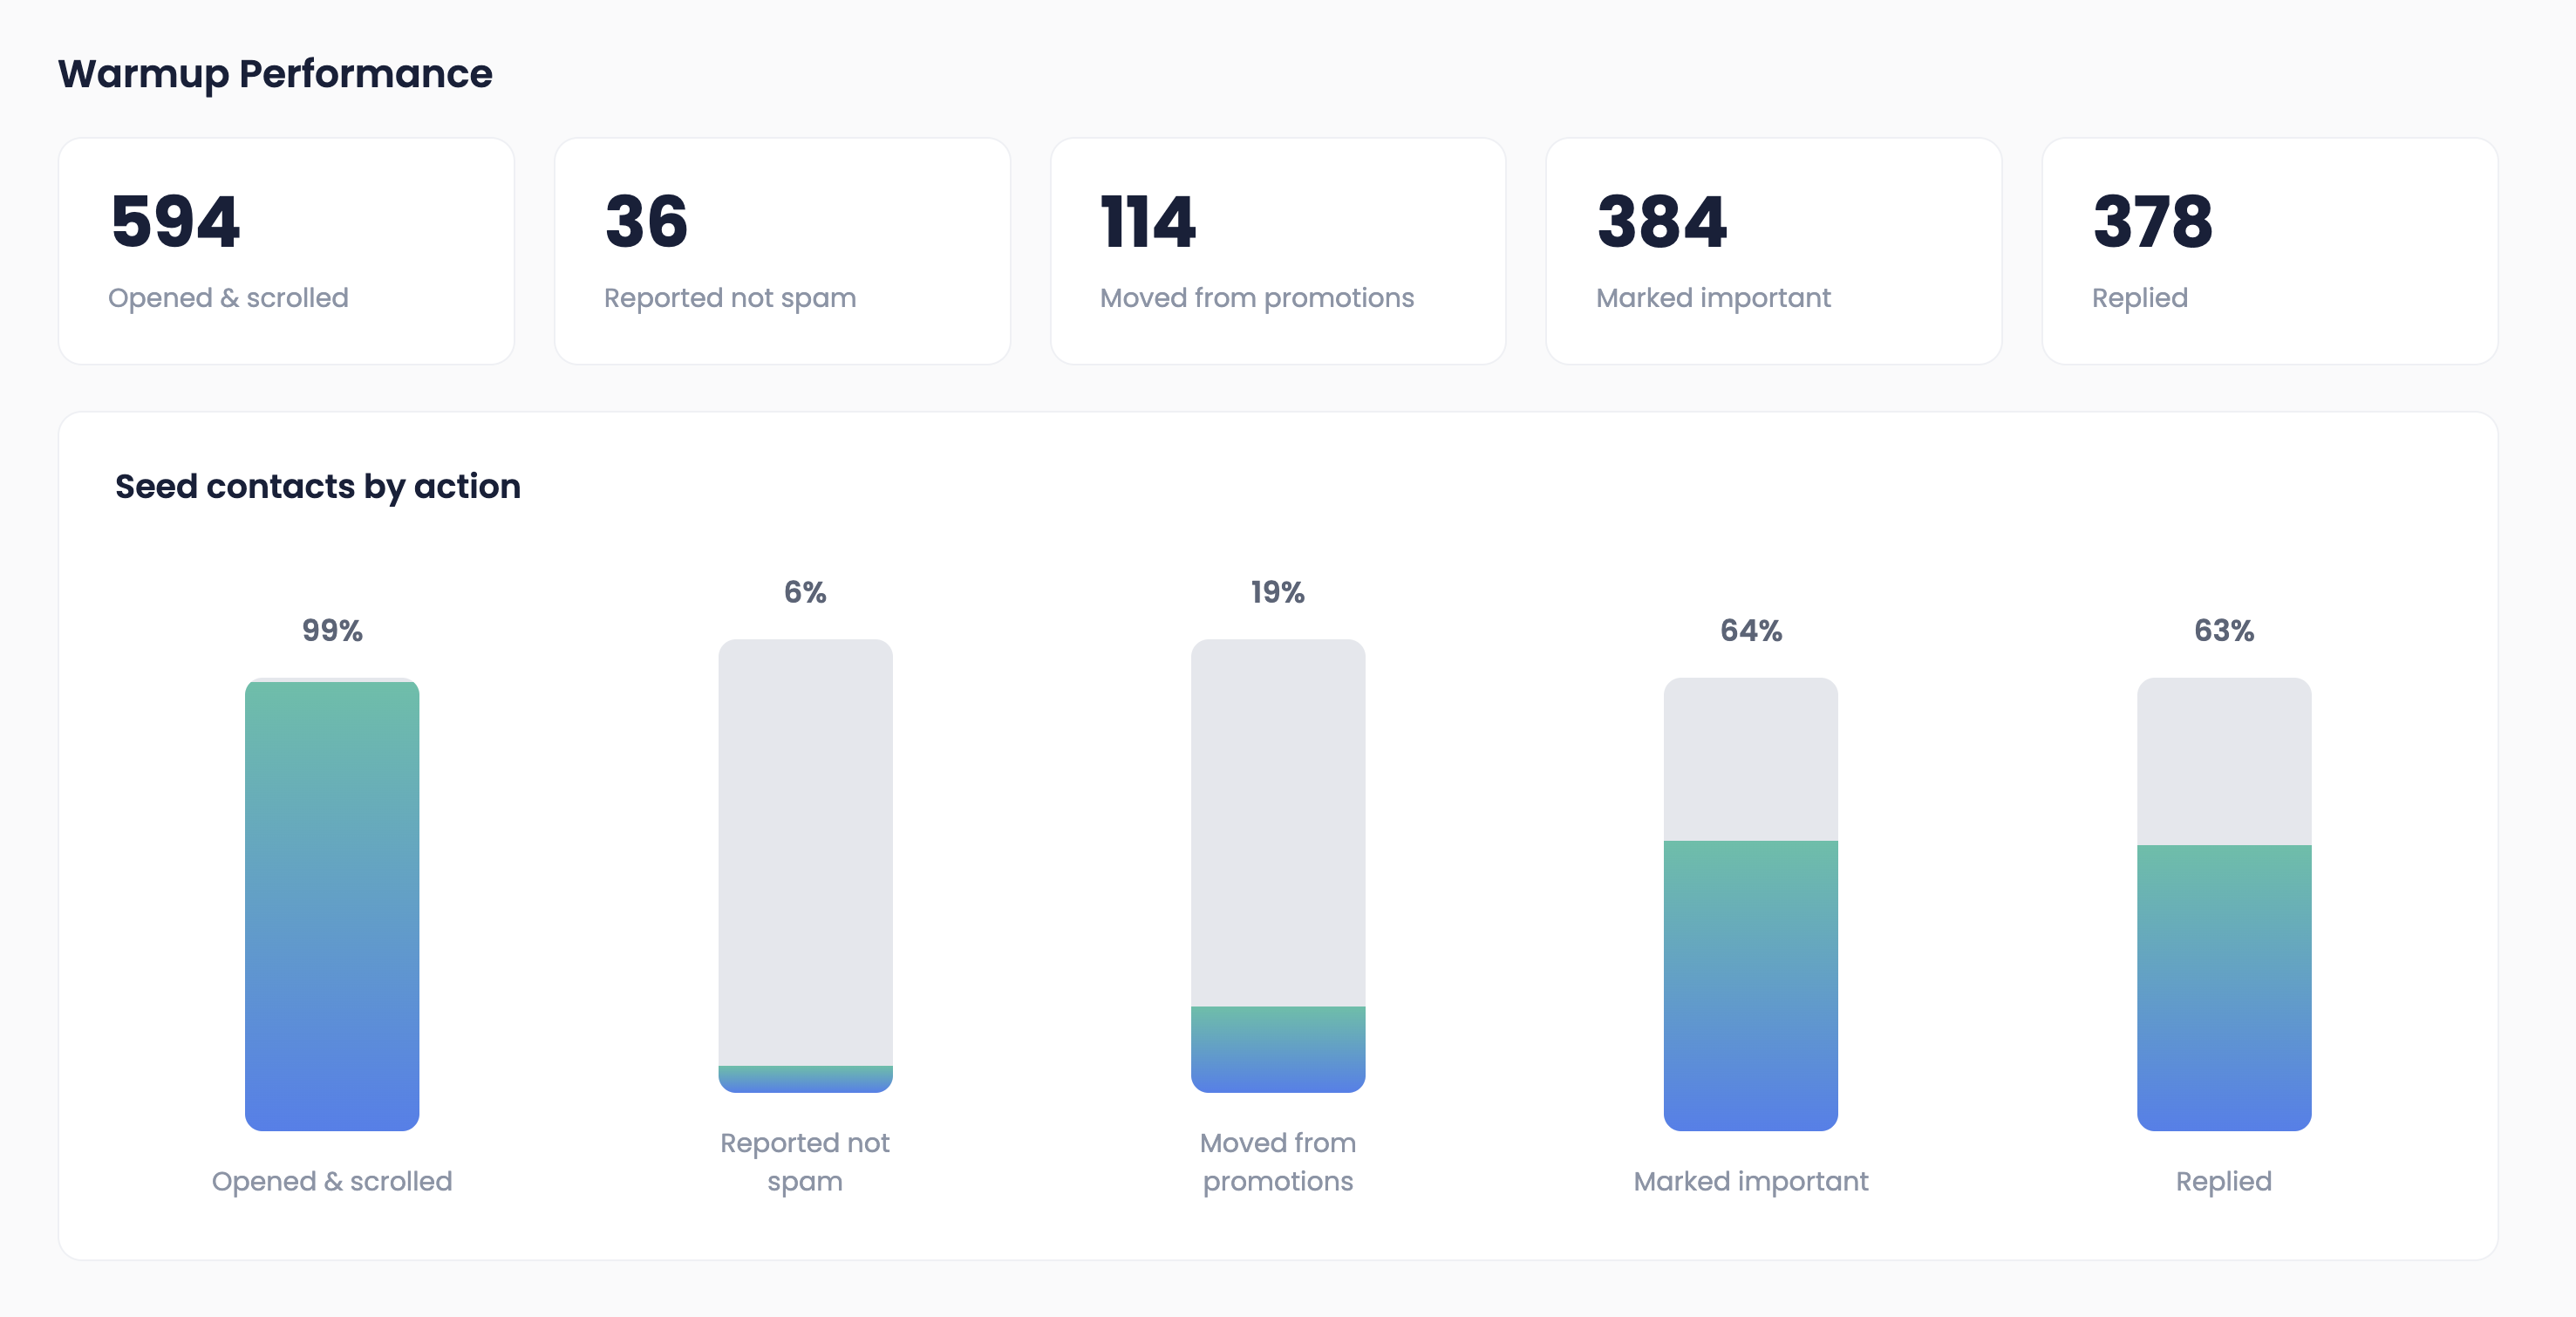
Return to your E-Warmup campaign page to track engagement and inbox placement as the seeds start interacting with your emails.
Quick tips
Always use the exact sender address you registered, and make sure it's on the domain you're warming up.
Never remove the tracking code from the email body.
Start with a smaller seed list and increase gradually as your domain reputation builds.
Credits are only used when you download the CSV.
Keep the seed list separate from your real Klaviyo lists so warmup sends never mix with live campaigns.
Need more details about Seedlist Warmup? Check this article: Introducing Seedlist Warmup for Mailchimp, Klaviyo, Omnisend, Shopify, and any ESP that doesn't support SMTP.
Introducing Seedlist Warmup
Warmup for Mailchimp, Klaviyo, Omnisend, Shopify, and any ESP that doesn’t support SMTP